Setup Guides
Step-by-step guides to set up and use your account. Pick a topic below or use the menu to jump to any section.
Setting Up a Calendar
Create booking calendars, availability, and notifications.
Managing Contacts
Add, import, tag, filter, and work your contact database.
Pipelines & Opportunities
Track deals through stages, from new lead to won.
Setting Up a Calendar
From choosing the right type to going live with bookings.
Before you start
- AkarForge account access (Admin or Location Manager role)
- A Google or Outlook calendar ready, if you want two-way sync
- Know which staff members will be assigned to this calendar
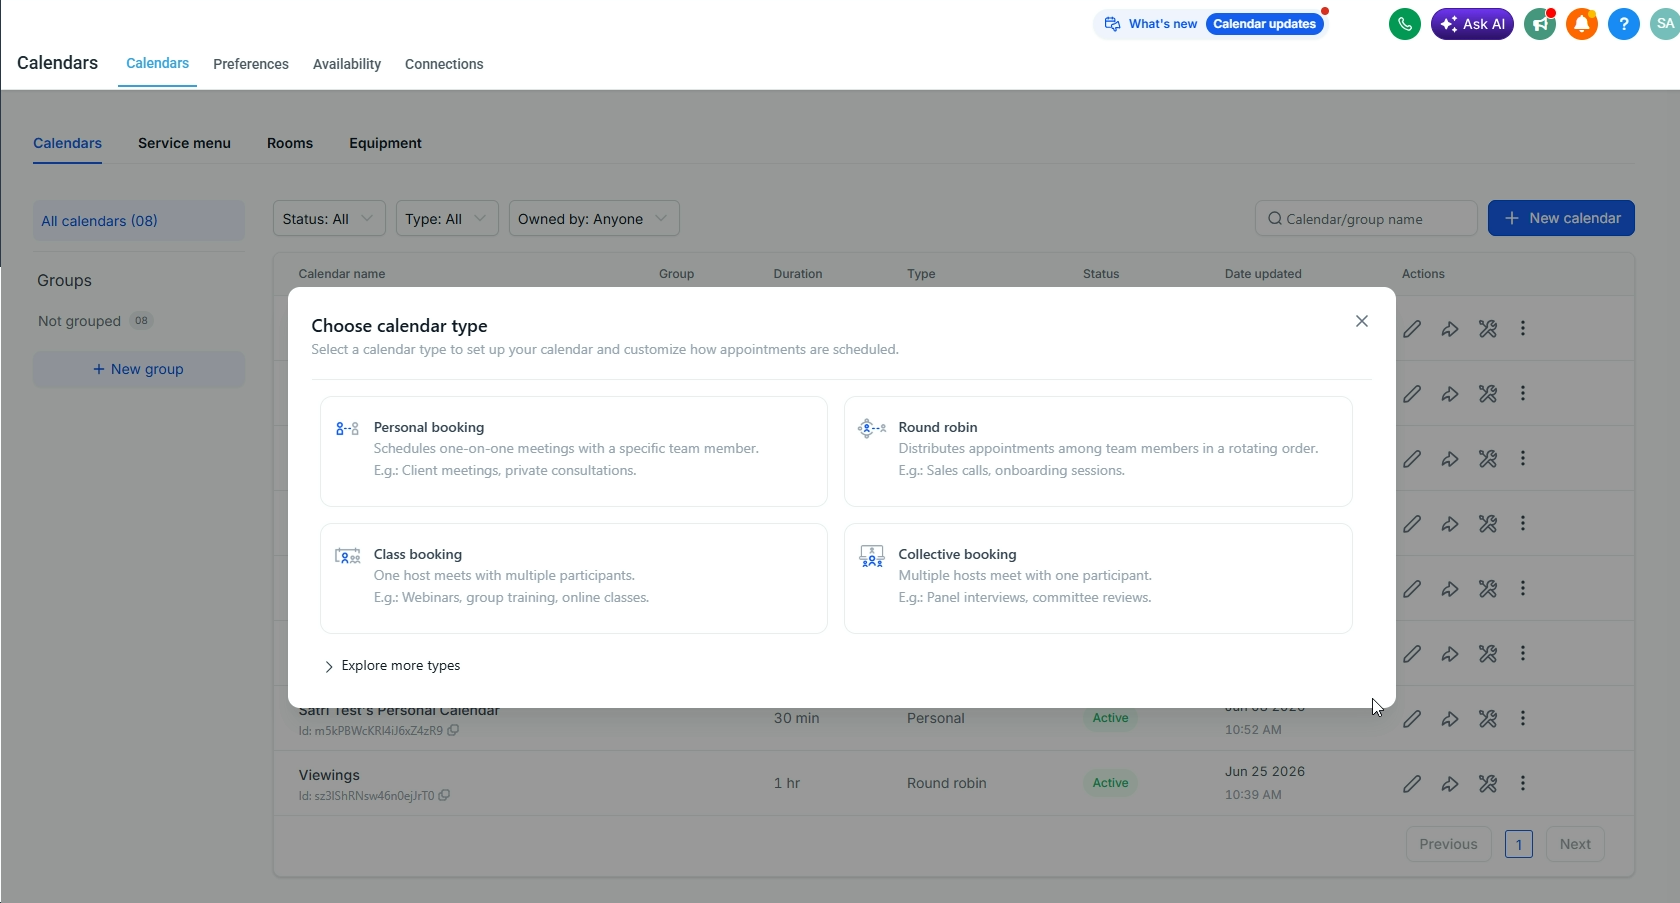
1 Choose your calendar type
Pick the right type before creating anything — it can't be changed after creation.
| Type | Use when |
|---|---|
| Simple | One staff member — clients book directly with them |
| Round Robin | Multiple staff — bookings auto-distribute |
| Collective | All assigned staff must be free at the same time |
| Service | Product/service booking (e.g. a property tour) |
| Class Booking | Multiple attendees in one slot (e.g. a group session) |
2 Create a Calendar Group
WHERE Calendars → Calendar Groups → + New Group
- Name the group clearly (e.g. Property Tours)
- Assign a slug — this appears in the booking URL
- Save
3 Create the Calendar
WHERE Calendars → + New Calendar
- Select the Calendar Group from Step 2
- Choose the Calendar Type from Step 1
- Name it clearly (e.g. Property Tour – Bali South)
- Set the calendar slug (becomes the direct booking URL)
- Click Save & Continue
4 Connect Google / Outlook
WHERE Calendar Settings → Connections
- Click Connect Google Calendar (or Outlook)
- Authenticate via the popup
- Select which calendar to check for conflicts (usually your primary)
- Enable Two-way sync so bookings appear in both places
5 Set Availability
WHERE Calendar Settings → Availability
| Setting | What it controls | Recommended |
|---|---|---|
| Working Hours | Days + hours bookable | Match staff hours |
| Slot Duration | Length of each appointment | 30 or 60 min |
| Buffer Time | Gap between appointments | 15 min |
| Min Scheduling Notice | How far ahead clients must book | 24h minimum |
| Date Range | How far ahead clients can book | 30–60 days |
| Max Bookings/Day | Cap on daily appointments | Set per capacity |

6 Assign Staff & Round Robin
WHERE Calendar Settings → Team Members
- Click + Add Team Member
- Select staff from the AkarForge user list
- For Round Robin: set priority weight per person (equal = even split)
- Enable Check Staff Calendar to respect each member's conflicts
7 Booking Form Fields
WHERE Calendar Settings → Forms
- Default fields: Name, Email, Phone — always on
- Add custom fields as needed (e.g. property interest, budget)
- Mark each field Required or Optional
- Set Confirmation Behaviour: redirect to a thank-you page, or show an inline message
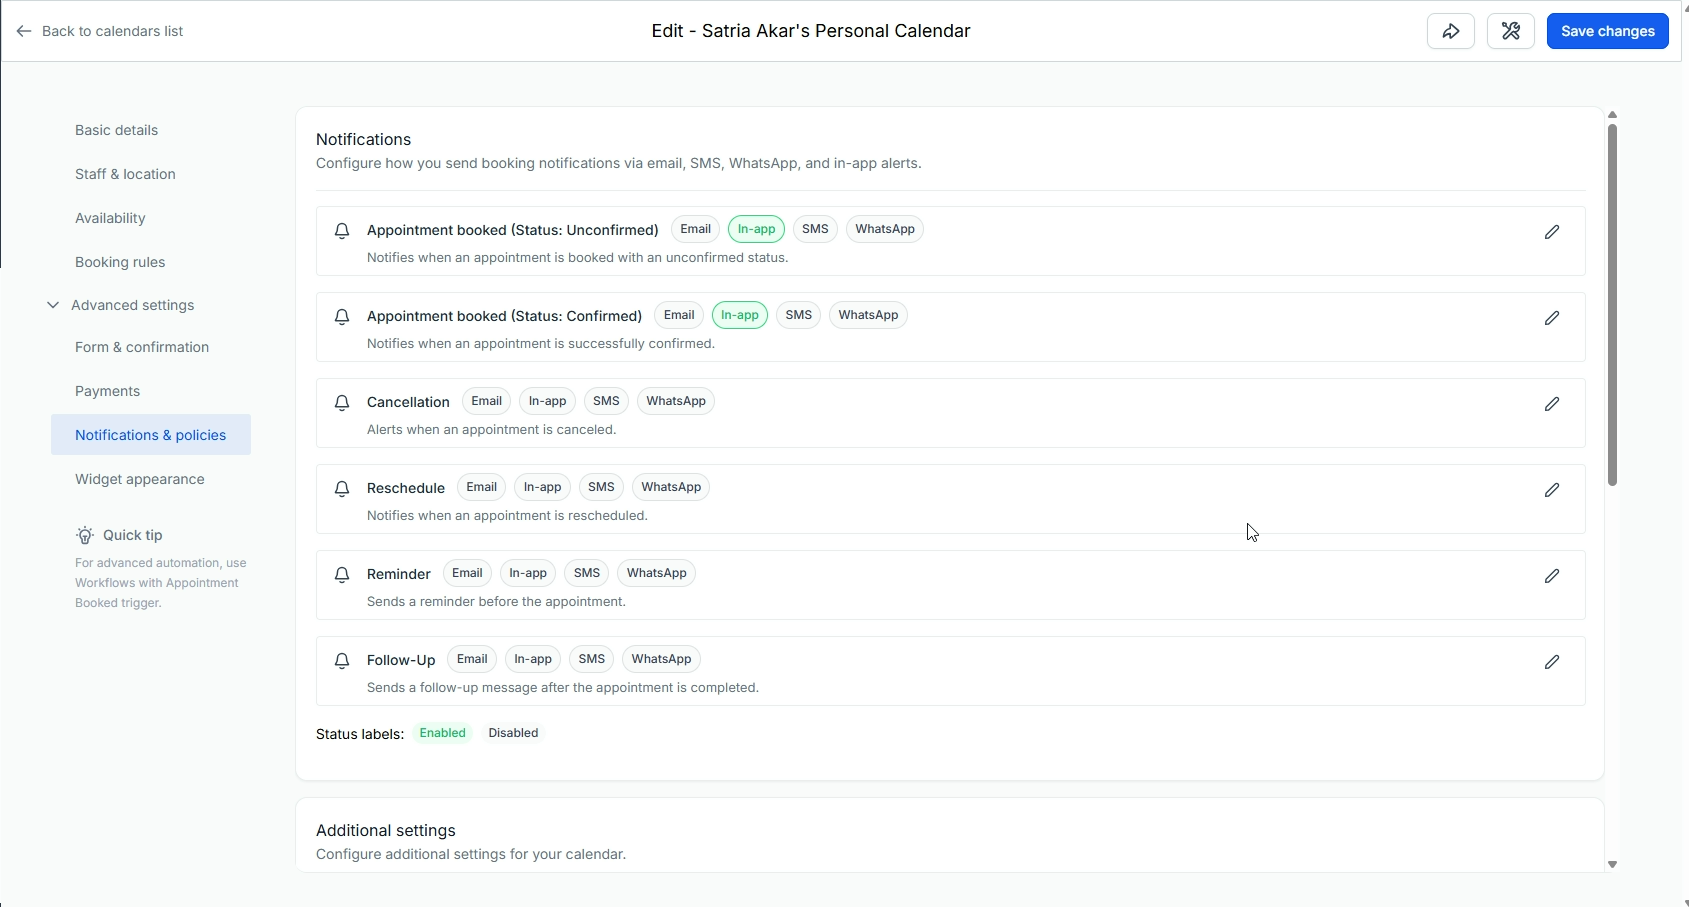
8 Notifications & Reminders
WHERE Calendar Settings → Notifications & Reminders
| Notification | Recipient | Timing |
|---|---|---|
| Booking Confirmation | Client | Immediate |
| Booking Alert | Staff | Immediate |
| Reminder | Client | 24h + 1h before |
| Cancellation Notice | Both | On cancel |
Channels: Email, SMS, or WhatsApp (WhatsApp requires a connected number).
9 Get & Share the Booking Link
WHERE Calendar Settings → Sharing
- Direct link — share it directly or drop it into messages
- Embed widget — copy the iframe code and paste it into any external website
Managing Contacts
Adding, importing, organizing, and working your database.
1 The Contacts area at a glance
Open Contacts from the left sidebar. Along the top you'll find these sections:
| Section | What it's for |
|---|---|
| Contacts | The full list of everyone in your database |
| Smart Lists | Saved, filtered views (e.g. "Hot Leads") |
| Bulk Actions | Track large jobs run on many contacts at once |
| Restore | Recover recently deleted contacts |
| Tasks | Every task assigned across all contacts |
| Companies | Group contacts under a business/organization |
| Manage Smart Lists | Rename, reorder, or delete your saved lists |
2 Adding contacts
There are four ways contacts get in:
- Manually — Contacts → + Add Contact
- Import a CSV — bulk-load an existing list (next section)
- Automatically from forms, surveys & calendars — anyone who submits becomes a contact
- Via automations / integrations — workflows and connected tools create contacts for you
3 Importing from a CSV
WHERE Contacts → Import option
- Prepare a spreadsheet with a header row (First Name, Email, Phone…)
- Upload the .csv file
- Map each column to a contact field (create custom fields first for data that doesn't fit)
- Choose how to handle duplicates — update existing or skip
- Add a tag to the whole import (e.g. Import – June 2026)
- Run the import
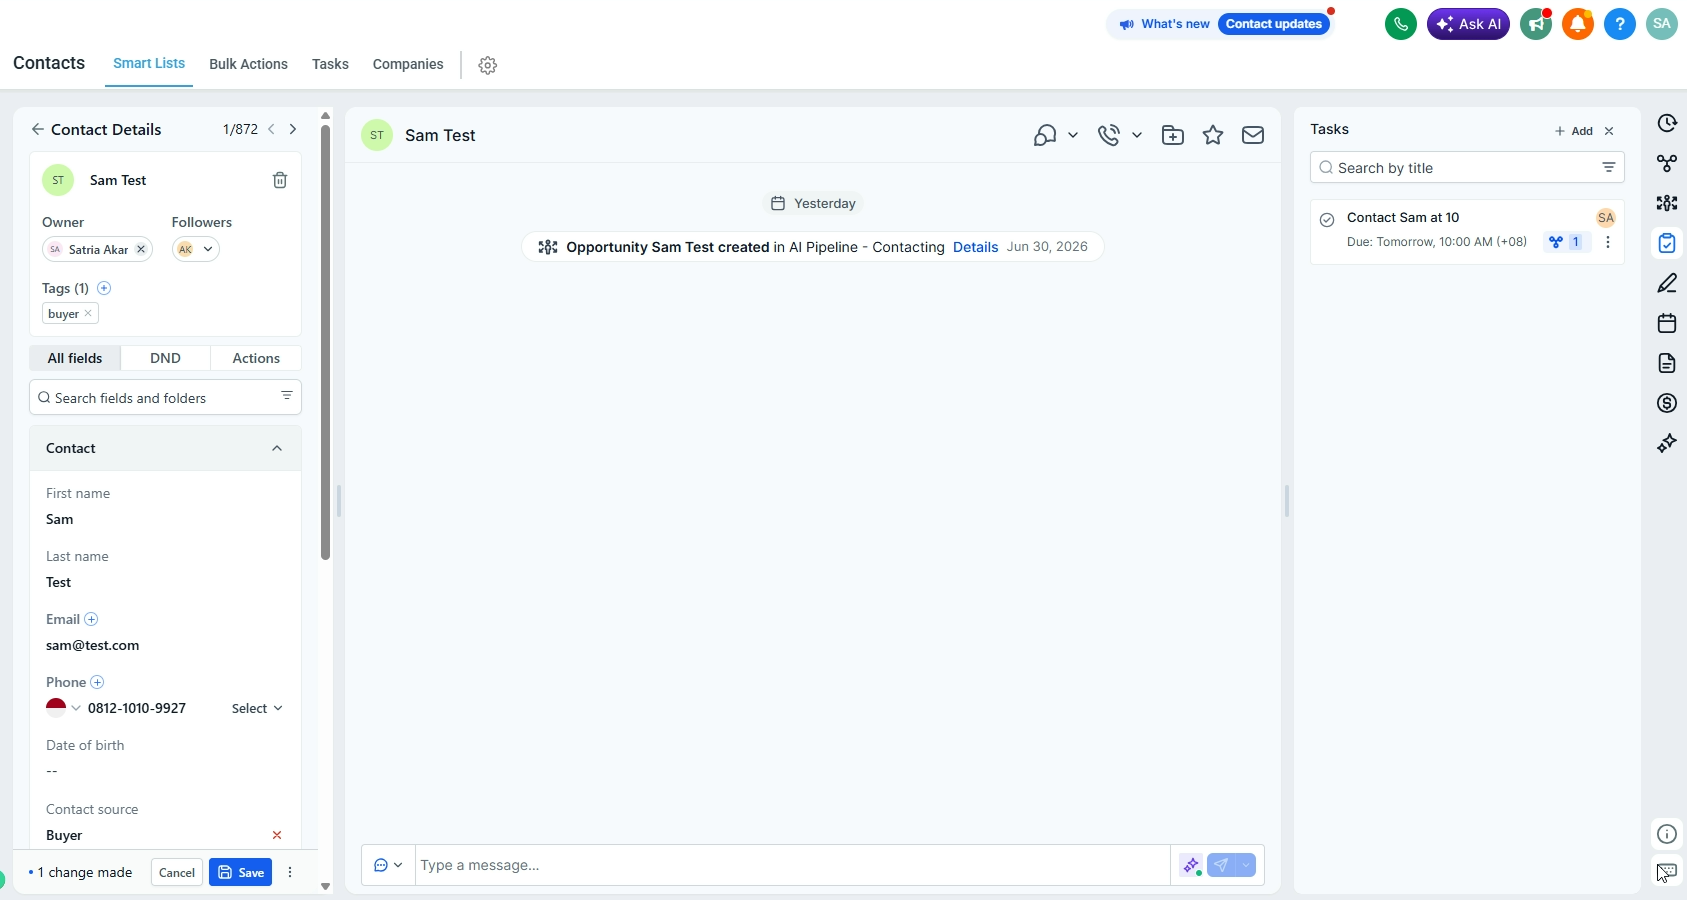
4 Anatomy of a contact record
Click any contact to open their record — it holds everything about that person:
| Element | What it holds |
|---|---|
| Contact details | Name, phone, email, address, custom fields |
| Tags | Labels for segmenting (e.g. "Buyer", "VIP") |
| Owner / Followers | Assigned staff member + anyone watching |
| Conversations | Every SMS, email, WhatsApp & call in one thread |
| Notes | Free-text notes from your team |
| Tasks | To-dos with due dates and an assignee |
| Appointments | Every booking linked to this contact |
| Opportunities | Deals this contact is in, and their stage |
| Activity timeline | A full audit trail of everything that happened |
| DND settings | Do-Not-Disturb toggles per channel |
5 Tags
Tags are simple labels that power your segmenting and automations.
- Add a tag on a record, or in bulk to many contacts at once
- Use a naming convention — Status: Hot, Source: Facebook, Type: Buyer
6 Custom fields
WHERE Settings → Custom Fields
When built-in fields aren't enough, create your own (Budget, Preferred Area, Move-in Date…).
- Choose a type: text, number, dropdown, date, checkbox, file upload, etc.
- Group related fields into a folder for a clean record layout
- The field appears on every contact and works in forms, imports & automations
7 Smart Lists & filters
A Smart List is a saved filter you return to in one click.
- In Contacts, click More Filters
- Filter by tag, custom field, date added, source, assigned user & more
- Click Save as Smart List and name it (e.g. "Buyers – Canggu")
- It now lives as a tab for instant access
8 Bulk actions
Tick multiple contacts (or a whole Smart List) and act on all of them at once:
| Action | Use it to… |
|---|---|
| Add / Remove Tag | Re-segment a group in one move |
| Add to Campaign | Enrol a group into a marketing campaign |
| Send Email / SMS | Message the whole selection at once |
| Assign to a user | Hand a batch of leads to a staff member |
| Export | Download the selection as a CSV |
| Merge | Combine duplicate records into one |
| Delete | Remove a batch (recoverable via Restore) |
9 Notes, tasks & conversations
- Notes — log context ("Prefers WhatsApp, budget flexible")
- Tasks — a to-do with a due date and assignee; shows in the Tasks section
- Conversations — send SMS, email, or WhatsApp from the record; replies thread here
- Appointments — book directly onto the contact; it links to their record
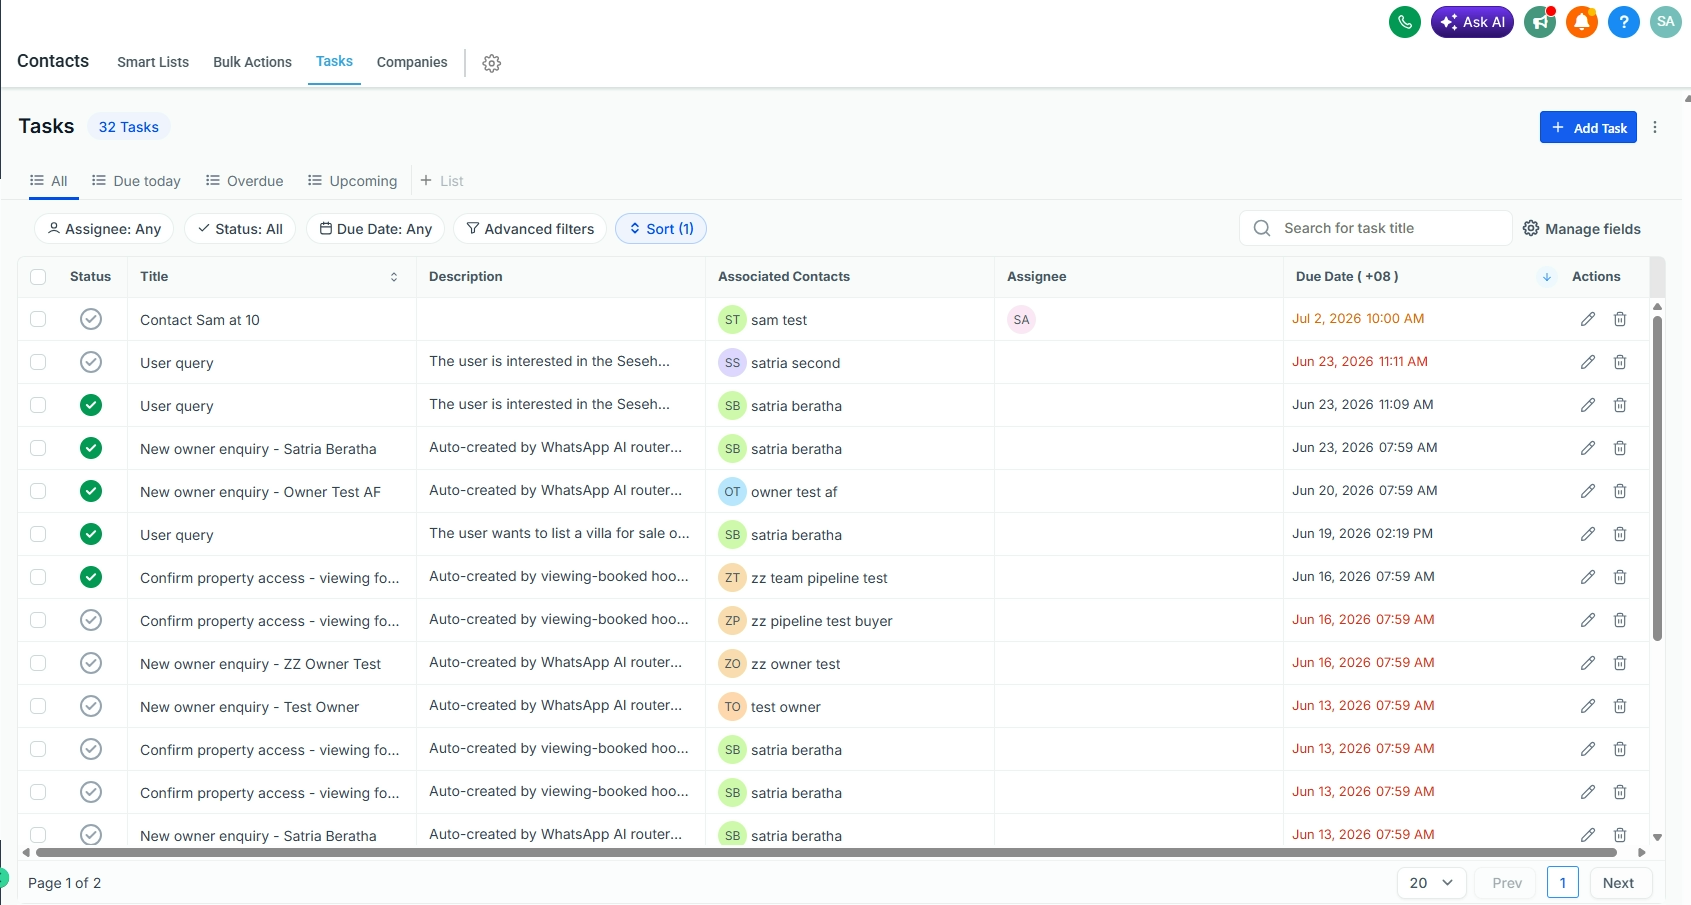
The Tasks tab (Contacts → Tasks) lists every task across all contacts. Filter by assignee, status, or due date; switch between All / Due today / Overdue / Upcoming; and click + Add Task to create one with a title, description, associated contact, assignee, and due date.
10 Do-Not-Disturb (DND)
Each contact has DND toggles to stop outbound messaging per channel (SMS, Email, Calls, WhatsApp) — set on unsubscribe, or manually.
11 Keeping the database clean
- Merge duplicates — select two records → Merge → pick which values to keep
- Restore deleted contacts from the Restore tab within the recovery window
- Export regularly as a backup, or to work data elsewhere
Pipelines & Opportunities
Track every deal from new lead to won, and automate the busywork.
1 The basics
Two terms that work together:
| Term | What it is |
|---|---|
| Opportunity | A single deal tied to a contact (e.g. "Villa purchase – John") |
| Pipeline | The set of stages a deal moves through (e.g. New → Contacted → Viewing → Offer → Won) |
| Stage | One column in the pipeline — where the deal is right now |
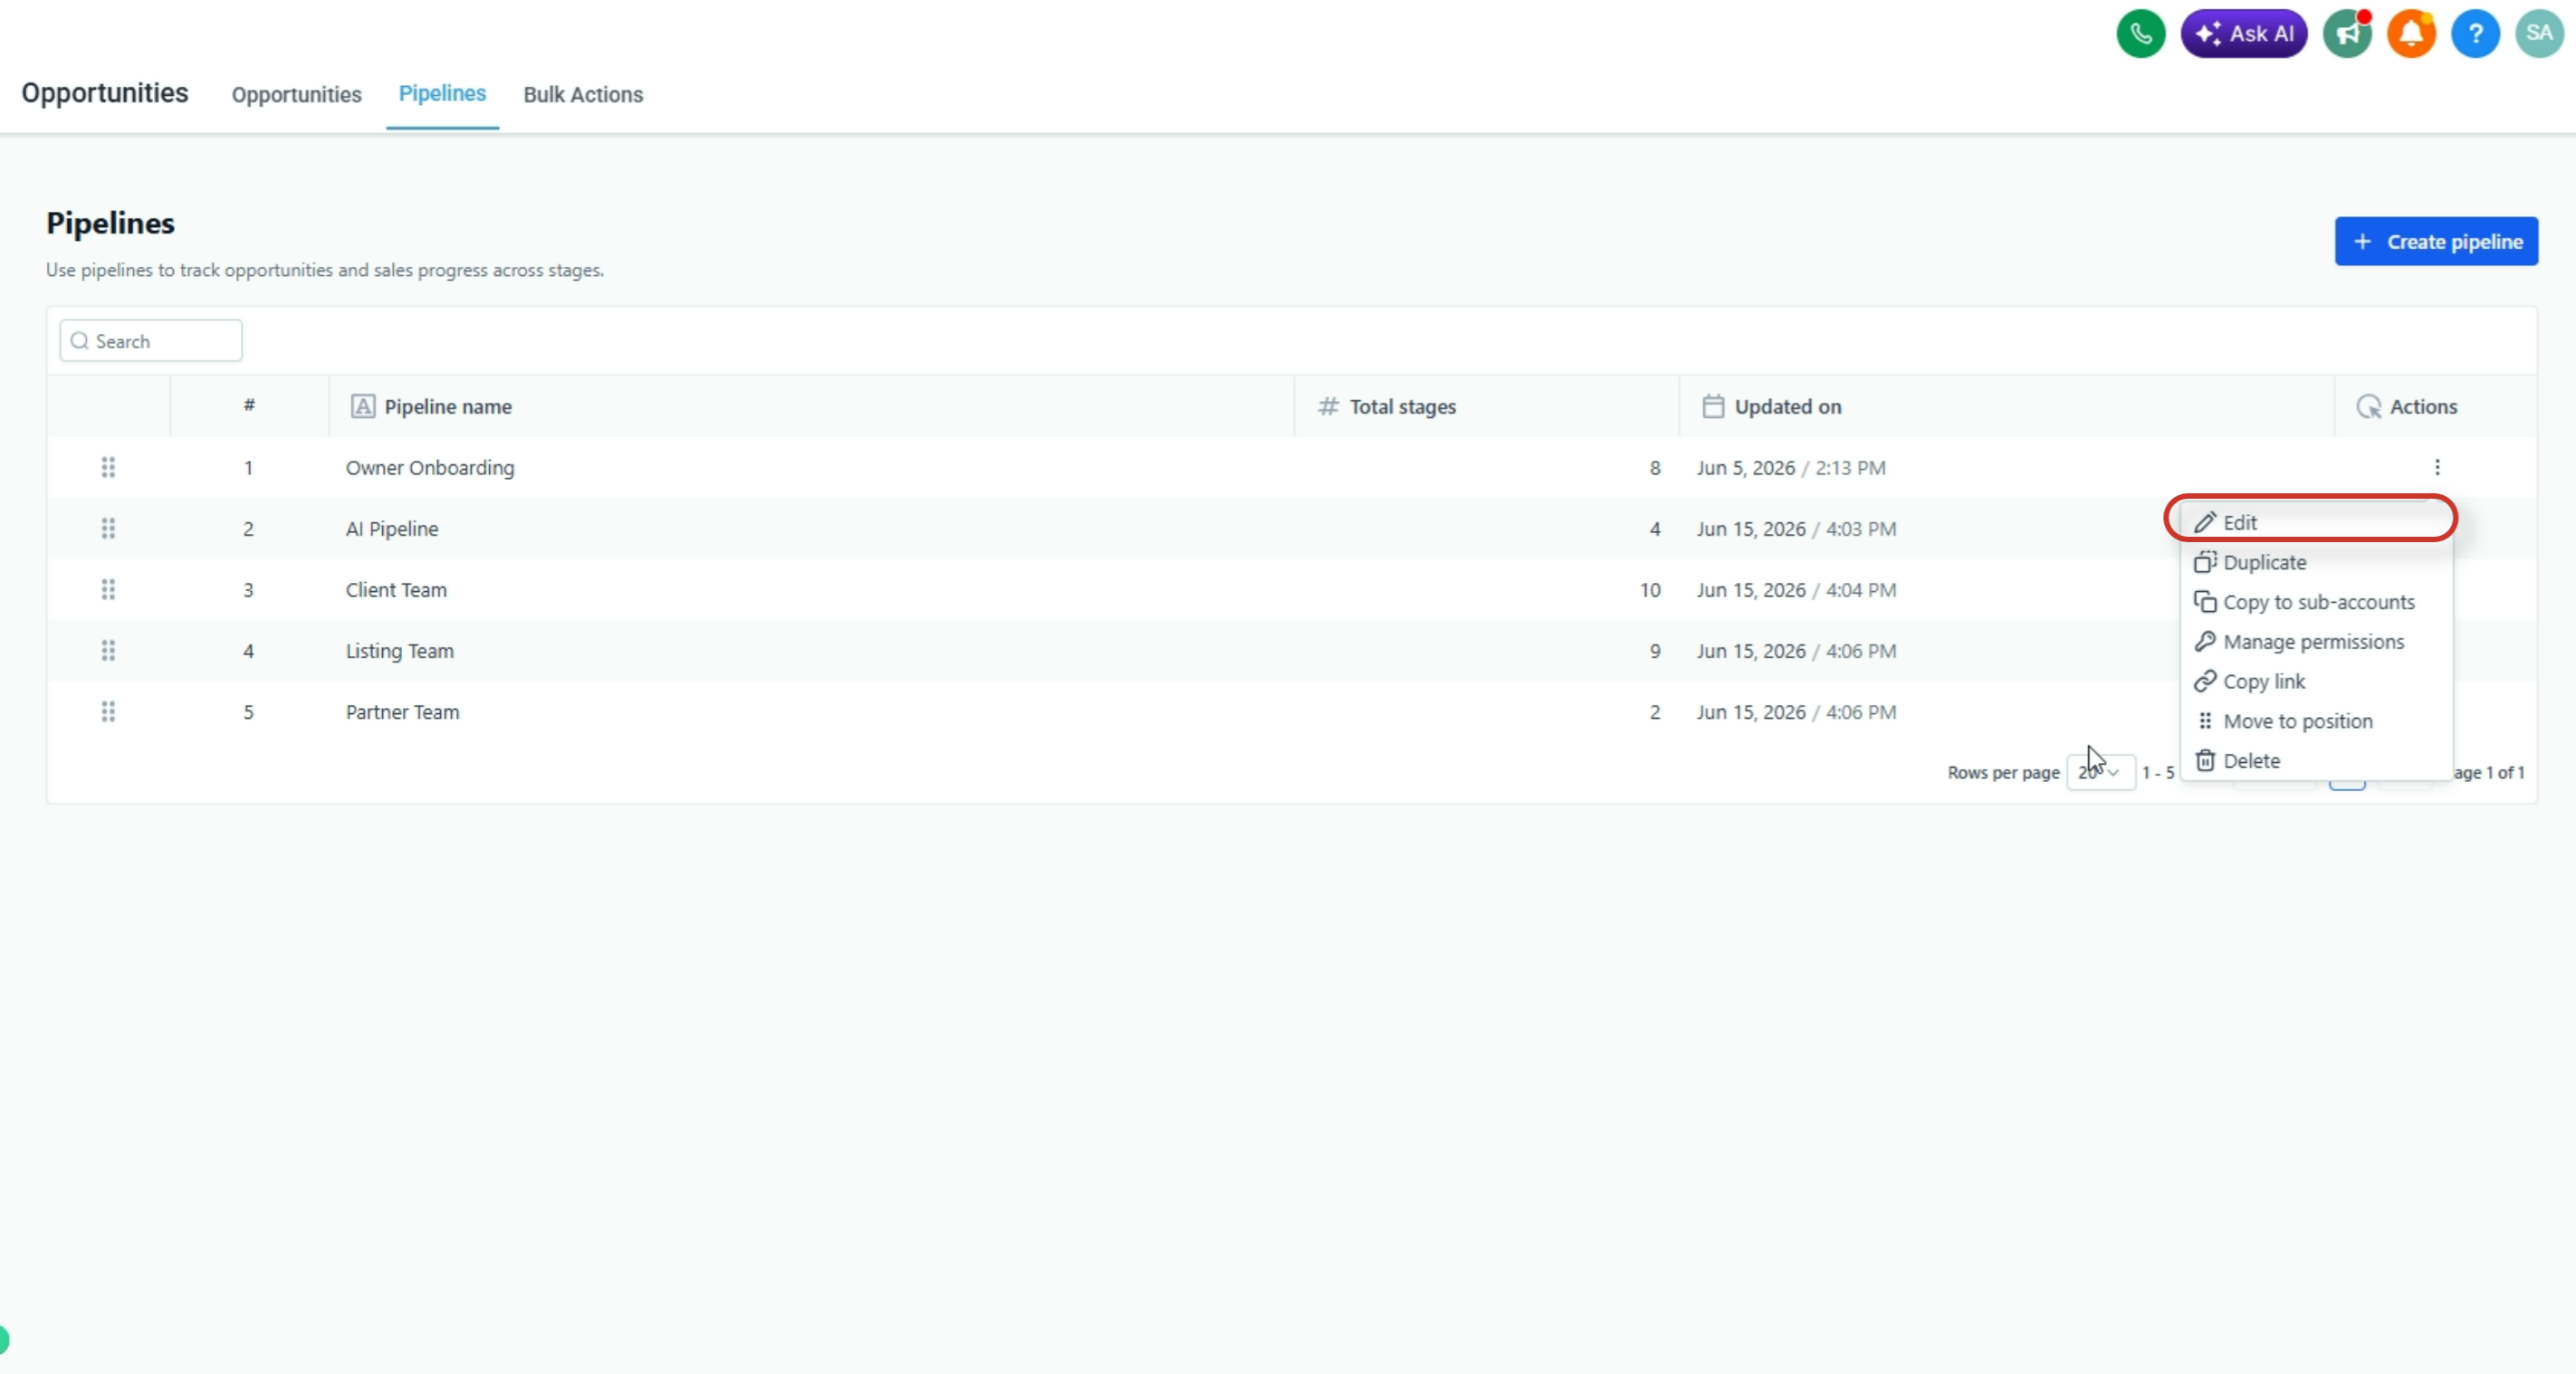
2 Create a Pipeline
WHERE Opportunities → Pipelines (gear icon) → + Create Pipeline
- Name it after the process, not a person (e.g. "Buyer Pipeline")
- You can run several pipelines (Buyers, Rentals, Sellers) — one per sales process
- Save
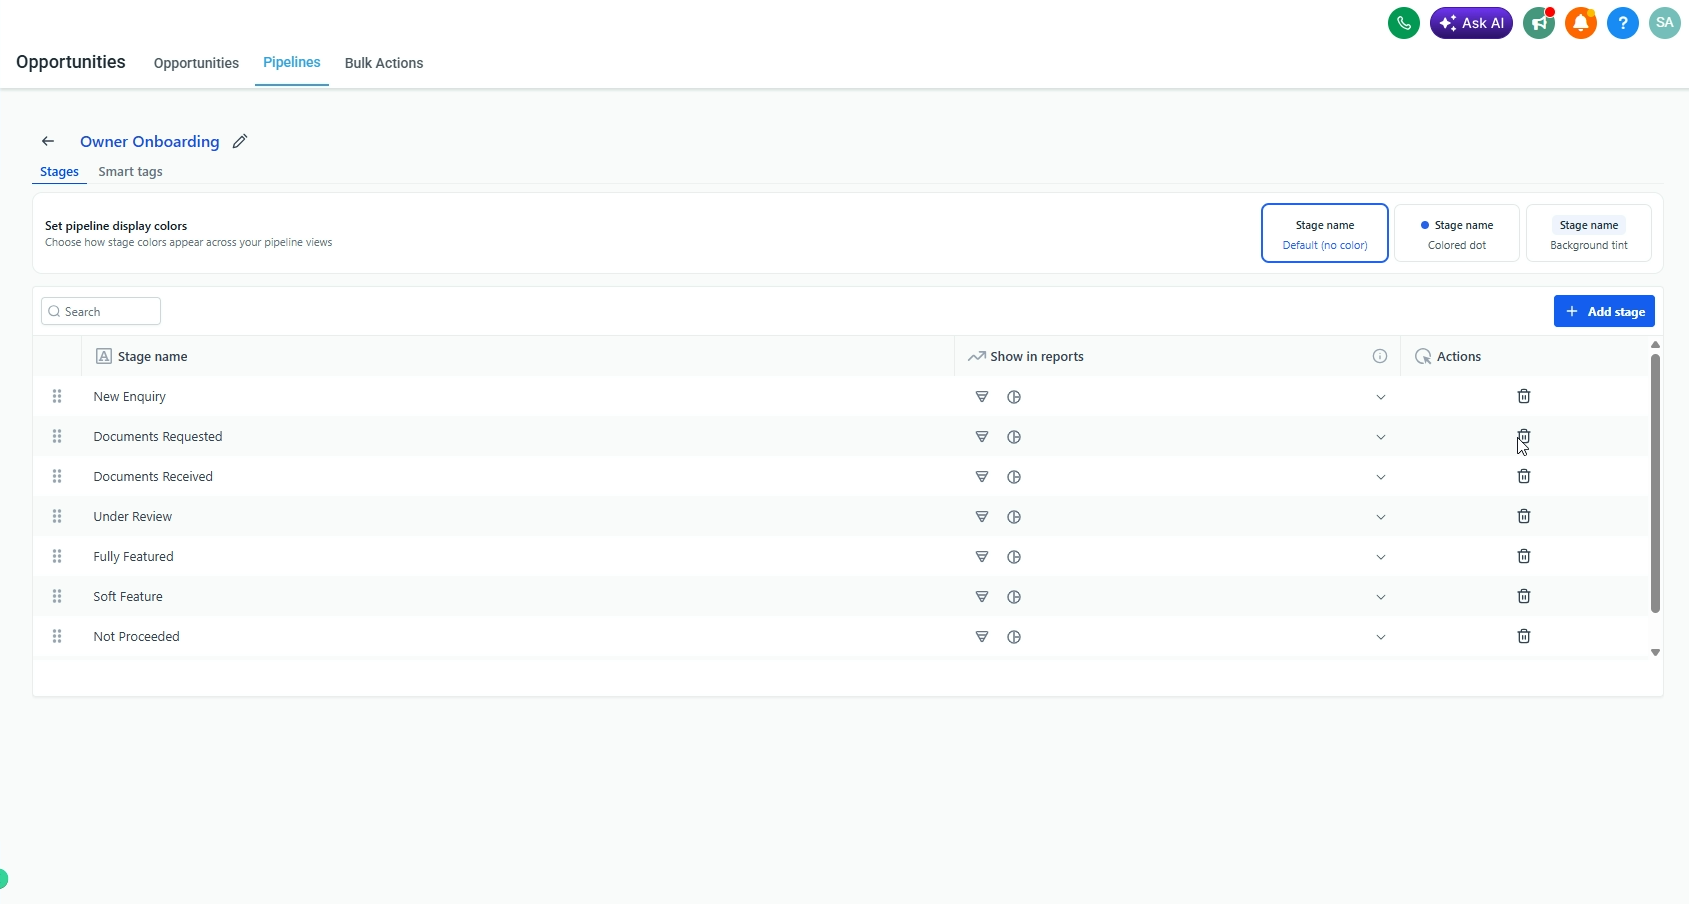
3 Set up Stages
Add the steps a deal passes through, in order. A typical buyer flow:
| Stage | Means |
|---|---|
| New Lead | Just came in, not yet contacted |
| Contacted | First outreach made |
| Viewing Booked | Tour/appointment scheduled |
| Offer | Negotiating / offer submitted |
| Won / Lost | Closed either way |
4 Add an Opportunity
WHERE Opportunities → + Add Opportunity
- Link the contact (or create one)
- Pick the pipeline and starting stage
- Set the opportunity value (the deal's monetary worth)
- Assign an owner (the staff member responsible)
- Save
5 Move deals through stages
- Board view: drag a card from one column to the next
- From the record: open the opportunity and change its stage
- Every move is logged on the contact's activity timeline

6 Value & status
Each opportunity carries a value and a status:
| Status | Meaning |
|---|---|
| Open | Still in play, moving through stages |
| Won | Closed successfully — counts toward revenue |
| Lost | Didn't close — record a reason |
| Abandoned | Went cold / no response |
7 Filters & views
- Switch between Board (Kanban) and List view
- Filter by owner, stage, value, date, or source
- Use it as a daily worklist — sort by "last activity" to spot stalled deals
8 Automate stage changes
WHERE Automation → Workflows
- Trigger on stage change — "Opportunity Status Changed" / "Pipeline Stage Changed" → send a message, create a task, notify staff
- Auto-advance from a booking — a calendar's "Appointment Booked" trigger can move the opportunity to "Viewing Booked" (ties into the Calendar guide, Step 10)
- Auto-create — a new form submission can create an opportunity in "New Lead" automatically